
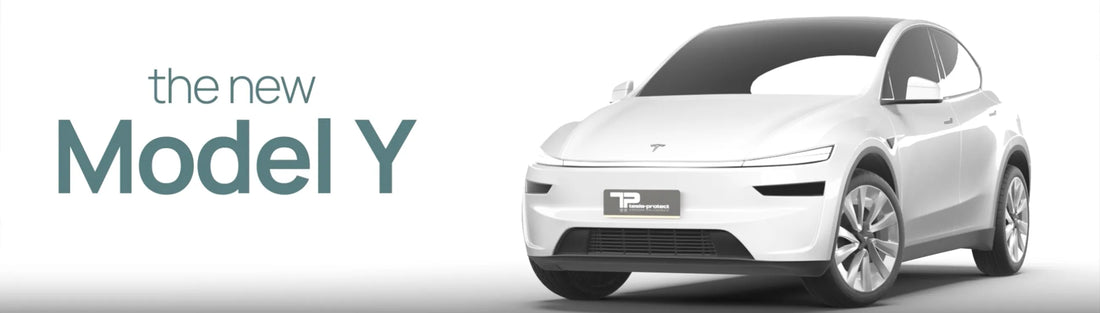
Tesla Model Y Juniper DIY PPF: Standard, Premium and Performance
On a Tesla Model Y "Juniper", the panels that take damage first are the ones facing the road: the front bumper, then the hood and front fenders, then the lower doors and side skirts. Each is a separate pre-cut kit, and the car comes in three trims — Standard, Premium and Performance — whose patterns are not interchangeable. Several panels, the bumpers above all, are cut differently for each trim, so you have to order from the product page for your exact trim. For a given trim, the 2026 model year uses the same patterns as 2025.
- Which panels to cover first, and why
- Which kit fits your car: Standard, Premium or Performance
- Does the 2026 Model Y Juniper use the same PPF patterns as 2025?
- Covering only the front of the car
- The full Model Y Juniper PPF kit
- How the Model Y Juniper patterns are made
- DIY or professional installation
- Background: the Juniper refresh and who makes these kits
- Frequently asked questions
Which panels to cover first, and why
The priority order below is geometric, not a matter of taste. Damage arrives from two directions — debris thrown forward at the car as it moves, and grit thrown backwards and upwards by its own tyres. The panels that sit in those two paths are the panels that get hit.
Tier 1 — the panels in the direct line of fire
- Bumper + Headlamp — the leading face of the car. Everything the road throws forward reaches this surface before it reaches anything else, and it is the one panel where the pattern also covers the headlamps.
- Hood + Fender — the surfaces immediately behind the bumper, standing in the airstream. Note that the hood and the front fenders are one pattern group, not two purchases. There is also a partial-coverage version, Hood + Fender one third.
- Door + Side Skirt + Rear Fender — the flanks, low down and closest to the road surface, where the front tyres throw grit rearwards along the car. This one is sold per side: left and right are two separate items, so covering both sides means ordering both.
Tier 2 — the extended set
- Trunk Lid — the panel you load luggage over, plus whatever the rear tyres and following traffic throw at it.
- A-Pillar + Roof (front) — the A-pillars and the front edge of the roof meet the airstream head-on, and this is one of the smaller of the large-panel kits.
- Roof — the largest exposed horizontal surface on the car.
- Rear Bumper — the loading edge you drag luggage across, and the panel closest to the spray thrown up by the car behind you.
Where exactly the Trunk Lid, A-Pillar + Roof, Roof and Rear Bumper belong relative to one another depends on how you drive and where you park, and we would rather say that than invent a ranking.
Tier 3 — the small, high-touch parts
These sit in the same options list as the large panels and cost considerably less.
- Mirror and Door Handles — high-touch, scratch-prone areas; the handle recesses in particular collect fingernail marks.
- Lower Doors Impact Area and Rear Doors Impact Area — partial-coverage pieces for the lowest, most-hit strip of the doors, for when a full per-side kit is more than you want.
- Door Sills — the painted step you put your feet over every time you get in.
Exposure and install difficulty are two different lists
The order above ranks exposure. It is not an order of difficulty. Flat and single-curvature panels — hood, doors, trunk lid — ask less of the installer than a bumper, which curves in two directions at once and has to be worked into shape as it goes on. If you want to build confidence before touching the front end, that is a reason to start elsewhere; if you want the damage stopped where it actually happens, start at the bumper.


Bumper, hood and mirror cap installations on a Model Y "Juniper". The film arrives cut to the panel outline, so no blade is used on the car.
Which kit fits your car: Standard, Premium or Performance
The Model Y "Juniper" is sold as three trims — Standard, Premium and Performance — and each has its own product page. This matters more than it sounds, because the trims do not share one set of patterns. Several panels are cut differently from one trim to the next, so a part bought for the wrong trim will not fit.
What differs, and what is shared:
- Front bumper (Bumper + Headlamp) — different on all three trims. This is the clearest case. The Standard front bumper is a smooth shape with two small upper cutouts; the Performance is a sport bumper with large side air-intake cutouts, a lower splitter and separate corner pieces — a completely different shape cut to a completely different pattern. The Premium differs again. A bumper pattern is cut for one specific bumper and will not sit on another.
- Rear bumper — different on all three trims.
- Door + Side Skirt + Rear Fender (left and right), and Door Sills — the Standard differs from the Premium and Performance. The Premium and Performance share these patterns with each other; the Standard is cut differently.
- Trunk Lid — different on all three trims, cut around whatever sits on the back of the car: the Standard is plain; the Premium is cut around the "TESLA" wordmark with the "DUAL MOTOR" emblems or the "Launch Series" badge; the Performance is cut around the spoiler, the "TESLA" wordmark and the performance badge.
- Shared across all three trims: Hood + Fender, Hood + Fender one third, A-Pillar + Roof (front), Roof, Mirror and Door Handles. These are the same pattern whichever trim you own.
Because the bumpers and the lower-flank panels are trim-specific, the rule is simple: work out which trim you have, then order every part from that trim's product page, and do not carry a part from one trim's page onto another car. The quickest way to tell the trims apart is the back of the car — does it have a rear spoiler? (that is the Performance) and what badges are on the trunk lid?
Each trim is listed for both the 2025 and the 2026 model year. Within a trim these are the same patterns; the year exists only so the storefront shows the right listing.
Model Y Juniper Standard 2025 · Standard 2026
Model Y Juniper Premium 2025 · Premium 2026
Model Y Juniper Performance 2025 · Performance 2026
The options list on each trim page is the authority on what exists for your car, and the price for each part is shown there — it depends on the part and the film you choose. If a part you want genuinely is not offered on your trim's page, see how to order custom PPF parts even if your car is not listed rather than assuming it exists.

The Model Y "Juniper" Standard front bumper being flattened into a cutting pattern — mesh and measurements visible. This is the Standard bumper: a smooth shape with two small upper cutouts. Compare it with the Performance bumper further down — a different bumper, and a different pattern.
Does the 2026 Model Y Juniper use the same PPF patterns as 2025?
Yes — for the same trim. A 2026 Standard uses the same patterns as a 2025 Standard, a 2026 Performance the same as a 2025 Performance, and so on. What the model year does not do is stand in for the trim: it is the trim that decides which patterns you need (see the trim section above), and the year only picks the right listing within that trim.
The model year appears in the product handle so the storefront shows the right listing for the car you are shopping for — not because the film or the cut changes between years. Pick your trim first, then open the page for your model year. You will get the same patterns either way.
Covering only the front of the car
Front-end-only coverage is a common way to start, and you build it from the panel kits rather than from a separate product. Two combinations:
- Bumper + Headlamp and Hood + Fender — full coverage of the three panels that face forward.
- Bumper + Headlamp and Hood + Fender one third — a lighter front, with partial hood and fender coverage.
Both are ordered from your trim's product page, in the same options list as everything else — and because the front bumper is trim-specific, using the page for your exact trim is what makes the front piece fit. The price for each part is shown on the product page and depends on the part and the film you choose.
The full Model Y Juniper PPF kit
The Full PPF Kit now carries Model Y "Juniper" variants for Standard 2025-2026, Premium 2025-2026 and Performance 2025-2026 — choose your trim on the product page. Because the bumpers and lower-flank panels are trim-specific, each trim's Full Kit is cut for that trim, so picking the right trim here matters as much as it does for the individual parts. The price is shown on the product page and depends on the trim and the film you choose. Check the panel list shown there before ordering, so you know exactly what the single purchase covers relative to building it up part by part.
Film brand and finish are also chosen on the product page. Our material selection guide compares the films we stock.
How the Model Y Juniper patterns are made
PPF is a protective film laid over the paint, so grit and stone chips hit the film instead of the clear coat. A pre-cut kit is film that has already been cut to the outline of a specific panel on a specific car before it reaches you, which is why no blade goes near the paint and why the fit depends entirely on the pattern being right. Which film — brand and finish — is a separate choice, covered in the material selection guide.
Getting a flat sheet of film to sit on a curved panel is a geometry problem, and it is solved before the film is cut. The panel is 3D scanned, the mesh is cleaned up, and the surface is then flattened into a 2D shape with the stretch accounted for. The heatmap in the second image below marks where the film has to be worked into the panel hardest.


Left: the 3D scan mesh of a Model Y "Juniper" Performance front bumper. Right: the same bumper flattened into a 2D cutting pattern, with the stretch heatmap showing where the film has to conform hardest. This is the Performance sport bumper, with its side air-intake cutouts and splitter — a different bumper, and a different pattern, from the Standard bumper shown earlier.
Every panel is scanned and flattened this way, and every trim-specific panel is scanned from its own part. That is why the Standard and Performance bumpers pictured above are two different patterns rather than one: each was flattened from its own bumper, and the two shapes do not interchange. The long version — scanners, tolerances, edge-wrap allowances — is in how we make pre-cut PPF patterns.
DIY or professional installation
The honest way to decide is to be clear about what a pre-cut kit removes from the job and what it leaves with you.
What pre-cut removes: the shape problem. The film arrives cut to the panel outline and the curvature has already been solved, so nothing is trimmed on the vehicle and no blade is used near your paint.
What it does not remove: everything else. You still need the panel properly washed and decontaminated, a clean and reasonably dust-free space to work in, and the patience to work a bumper's compound curves without forcing them. Edges still have to be wrapped by hand. And a piece that has been set badly has to be lifted and re-floated, which is the part that most often goes wrong first time.
One thing worth settling before the film goes on: film seals a panel in the state you apply it in. If the paint already has small chips, deal with them first — a touch-up paint kit in the original colour is available at Tesla-Protect.com — because once the film is down, a chip underneath stays there.
A professional installation moves that risk to someone else: the installer works in a controlled bay and carries the cost of a piece of film that gets ruined, and you pay labour on top of the film. A DIY kit means you pay for the film and supply the labour, the space and the risk yourself.
Before committing either way, watch the panel you are worried about being installed. The installation guide and our YouTube channel carry our installation videos — being able to watch the job before buying is worth more than any claim we could make about how easy it is.
Background: the Juniper refresh and who makes these kits
The Model Y "Juniper" refresh began EU deliveries in March 2025, and the Performance version followed in September 2025 in Europe. Patterns for all three trims — Standard, Premium and Performance — are in the catalogue now, for both the 2025 and 2026 model years.
We have been making Tesla-specific, DIY-ready pre-cut PPF kits for more than five years under our own brand at Tesla-Protect.com. PPF-Kits.eu came later and carries pre-cut patterns from several film brands for makes and models beyond Tesla, for private owners and for trade customers.
Frequently asked questions
Which panels should I protect first on a Tesla Model Y Juniper?
Start with the panels in the line of fire: Bumper + Headlamp, then Hood + Fender, then Door + Side Skirt + Rear Fender for each side. Trunk Lid, A-Pillar + Roof (front), Roof and Rear Bumper are the extended set, and smaller parts such as Mirror, Door Handles, Door Sills and the door impact areas are listed separately. The price for each part is shown on the product page and depends on the part and the film you choose.
Does the 2026 Model Y Juniper use the same PPF patterns as 2025?
Yes, for the same trim. A 2026 Standard uses the same patterns as a 2025 Standard, and the same holds for Premium and Performance. The model year in the product handle exists so the storefront shows the right listing for your car, not because the film or the cut changes between years. Pick your trim first, then open the product page for your model year.
Is there a pre-cut PPF kit for the Model Y Juniper Standard?
Yes. Standard is one of the three Model Y Juniper trims, alongside Premium and Performance, with product pages for both the 2025 and 2026 model years. The trims do not share one set of patterns — the front and rear bumpers are cut differently on all three, the door/side-skirt/rear-fender and door-sill patterns differ between the Standard and the other two, and the trunk lid differs on each — so order the Standard parts from the Standard product page.
What is included in a full Model Y Juniper PPF kit?
The Full PPF Kit carries Model Y Juniper Standard, Premium and Performance variants for 2025 and 2026, so each trim's kit is cut for that trim — the bumpers and lower-flank panels are trim-specific. The product page lists the panels the single purchase covers, and the price is shown there and depends on the trim and the film you choose. Choose your trim, then check that panel list against the parts you would otherwise buy one by one.
Do I need to buy the left and right side kits separately?
Yes. Door + Side Skirt + Rear Fender is sold per side, so covering both flanks means ordering the left and the right as two separate items. On the Model Y Juniper these are trim-specific — the Standard is cut to a different pattern from the Premium and Performance — so order them from your trim's product page. The price for each side is shown there and depends on the film you choose.
What is the difference between the Standard, Premium and Performance kits?
The trims do not share one set of patterns. The front and rear bumpers are cut differently on all three: the Performance has a sport bumper with side air-intake cutouts and a splitter, where the Standard bumper is a smooth shape, so a bumper cut for one trim will not fit another. The door, side-skirt and rear-fender panels and the door sills differ between the Standard and the Premium/Performance. The trunk lid differs on each: Standard is plain, Premium is cut around the "TESLA" wordmark with the "DUAL MOTOR" emblems or "Launch Series" badge, and Performance around the spoiler, "TESLA" wordmark and performance badge. The hood, roof, A-pillar, mirrors and door handles are shared. Identify your trim — the spoiler and trunk-lid badges are the quickest tell — then order every part from that trim's product page.
Can I cover just the front of the car?
Yes, by combining panel kits: Bumper + Headlamp with Hood + Fender, or with the partial Hood + Fender one third. Both are ordered from the same options list on your trim's product page, and because the front bumper is trim-specific you need the page for your exact trim. The price for each part is shown there and depends on the part and the film you choose.
Do I have to cut anything on the car?
No. A pre-cut kit is film already cut to the outline of that specific panel on that specific trim, so no blade is used on the vehicle. What is still on you is cleaning the panel, working in a dust-free space, wrapping the edges by hand, and taking your time on the bumper's compound curves.


